
I got another UKG. It’s a gnocchi board. I say it’s a UKG because my grandma always just used her finger for homemade gnocchi, but I wanted ridges. Could you use a fork to make the ridges? Sure, but why wouldn’t you want a little gnocchi board? Plus you can flip the board over and it’s a mini cutting board (at least that’s what I tell Matt). After spaghetti, gnocchi is my favorite pasta. Hopefully that means I’ll put this UKG to good use!

I decided to satisfy a beet craving and try something different by making beet gnocchi. Making vegetable pasta isn’t hard. You just have to puree or mash your vegetable of choice and add it to the recipe. If your dough is too watery, then just add more flour. For hard root vegetables like carrots and beets, you have to cook your veggies before pureeing them, but if you want to make something like spinach or kale pasta, no pre-cooking is required. My recipe below is **Bonus UKG!!!! Aside from the fact that this is a delicious recipe, the most exciting part about my post is that you can use two UKGs in one recipe: the gnocchi board AND a potato ricer! From this recipe, I was able to have 4-7oz bags of frozen gnocchi and one 4oz serving for myself to eat right away.

Ingredients:
3 large beets
3 large potatoes
2-3 cups flour, plus additional for rolling
1egg
olive oil, salt, pepper to taste
Dough:
- First roast equal amounts of beets and potatoes with some olive oil, salt, and pepper. I always peel my beets before roasting them. Some people do it after, but I always have to eat a few right out of the oven and am too impatient to wait for them to cool. Tip: peel beets under cold running water so you don’t stain your hands.

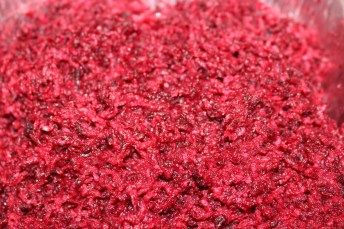
- After they’ve cooled, pureed the beets.

- Mix beets together with the potatoes in potato ricer**. I used the ricer twice to be sure the two veggies were incorporated well together. If you don’t have a ricer, you can use a masher, hand mixer, or puree everything again.
- Mixed one egg and flour to form the dough. Start with 2 cups of flour and if it’s too sticky, add more. I used about 2.5 cups total for the dough.

- Roll dough into a log and sprinkle it and surrounding area with flour.


- Cut about an inch off the dough log, and roll that piece into a long rope.

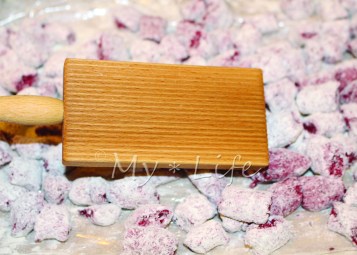
- After rolling a few ropes, line them up together and cut ½ inch pieces of gnocchi dumplings from the dough ropes. After rolling all the ropes and cutting the gnocchi dumplings, it’s time to use the gnocchi board!


- Using your thumb, gently roll each dumpling against the grooved side of your gnocchi board. I find having the board at a 45° angle is easiest, so I prop the board up on the inside of a bowl and let the gnocchi fall into the bowl


- After ridging all the gnocchi, you can cook or freeze.
- To freeze gnocchi, lay all the pieces in a single layer on a parchment lined baking sheet and freeze for 4 hours or overnight. After gnocchi is frozen, transfer into freezer zip baggies for storage.

- To cook gnocchi, just add to salted, boiling water and cook for about 5 minutes or taste test until done. The gnocchi will float when finished.


Beet gnocchi is very subtly sweet and delicious. I didn’t want to overpower the taste, so I sautéed cooked gnocchi with some chopped sage leaves in butter and olive oil and sprinkled some goat cheese on top. This would also work well with a really light cream sauce too. Yum! My new favorite gnocchi! If you have any other ideas on how to dress the gnocchi, let me know!


