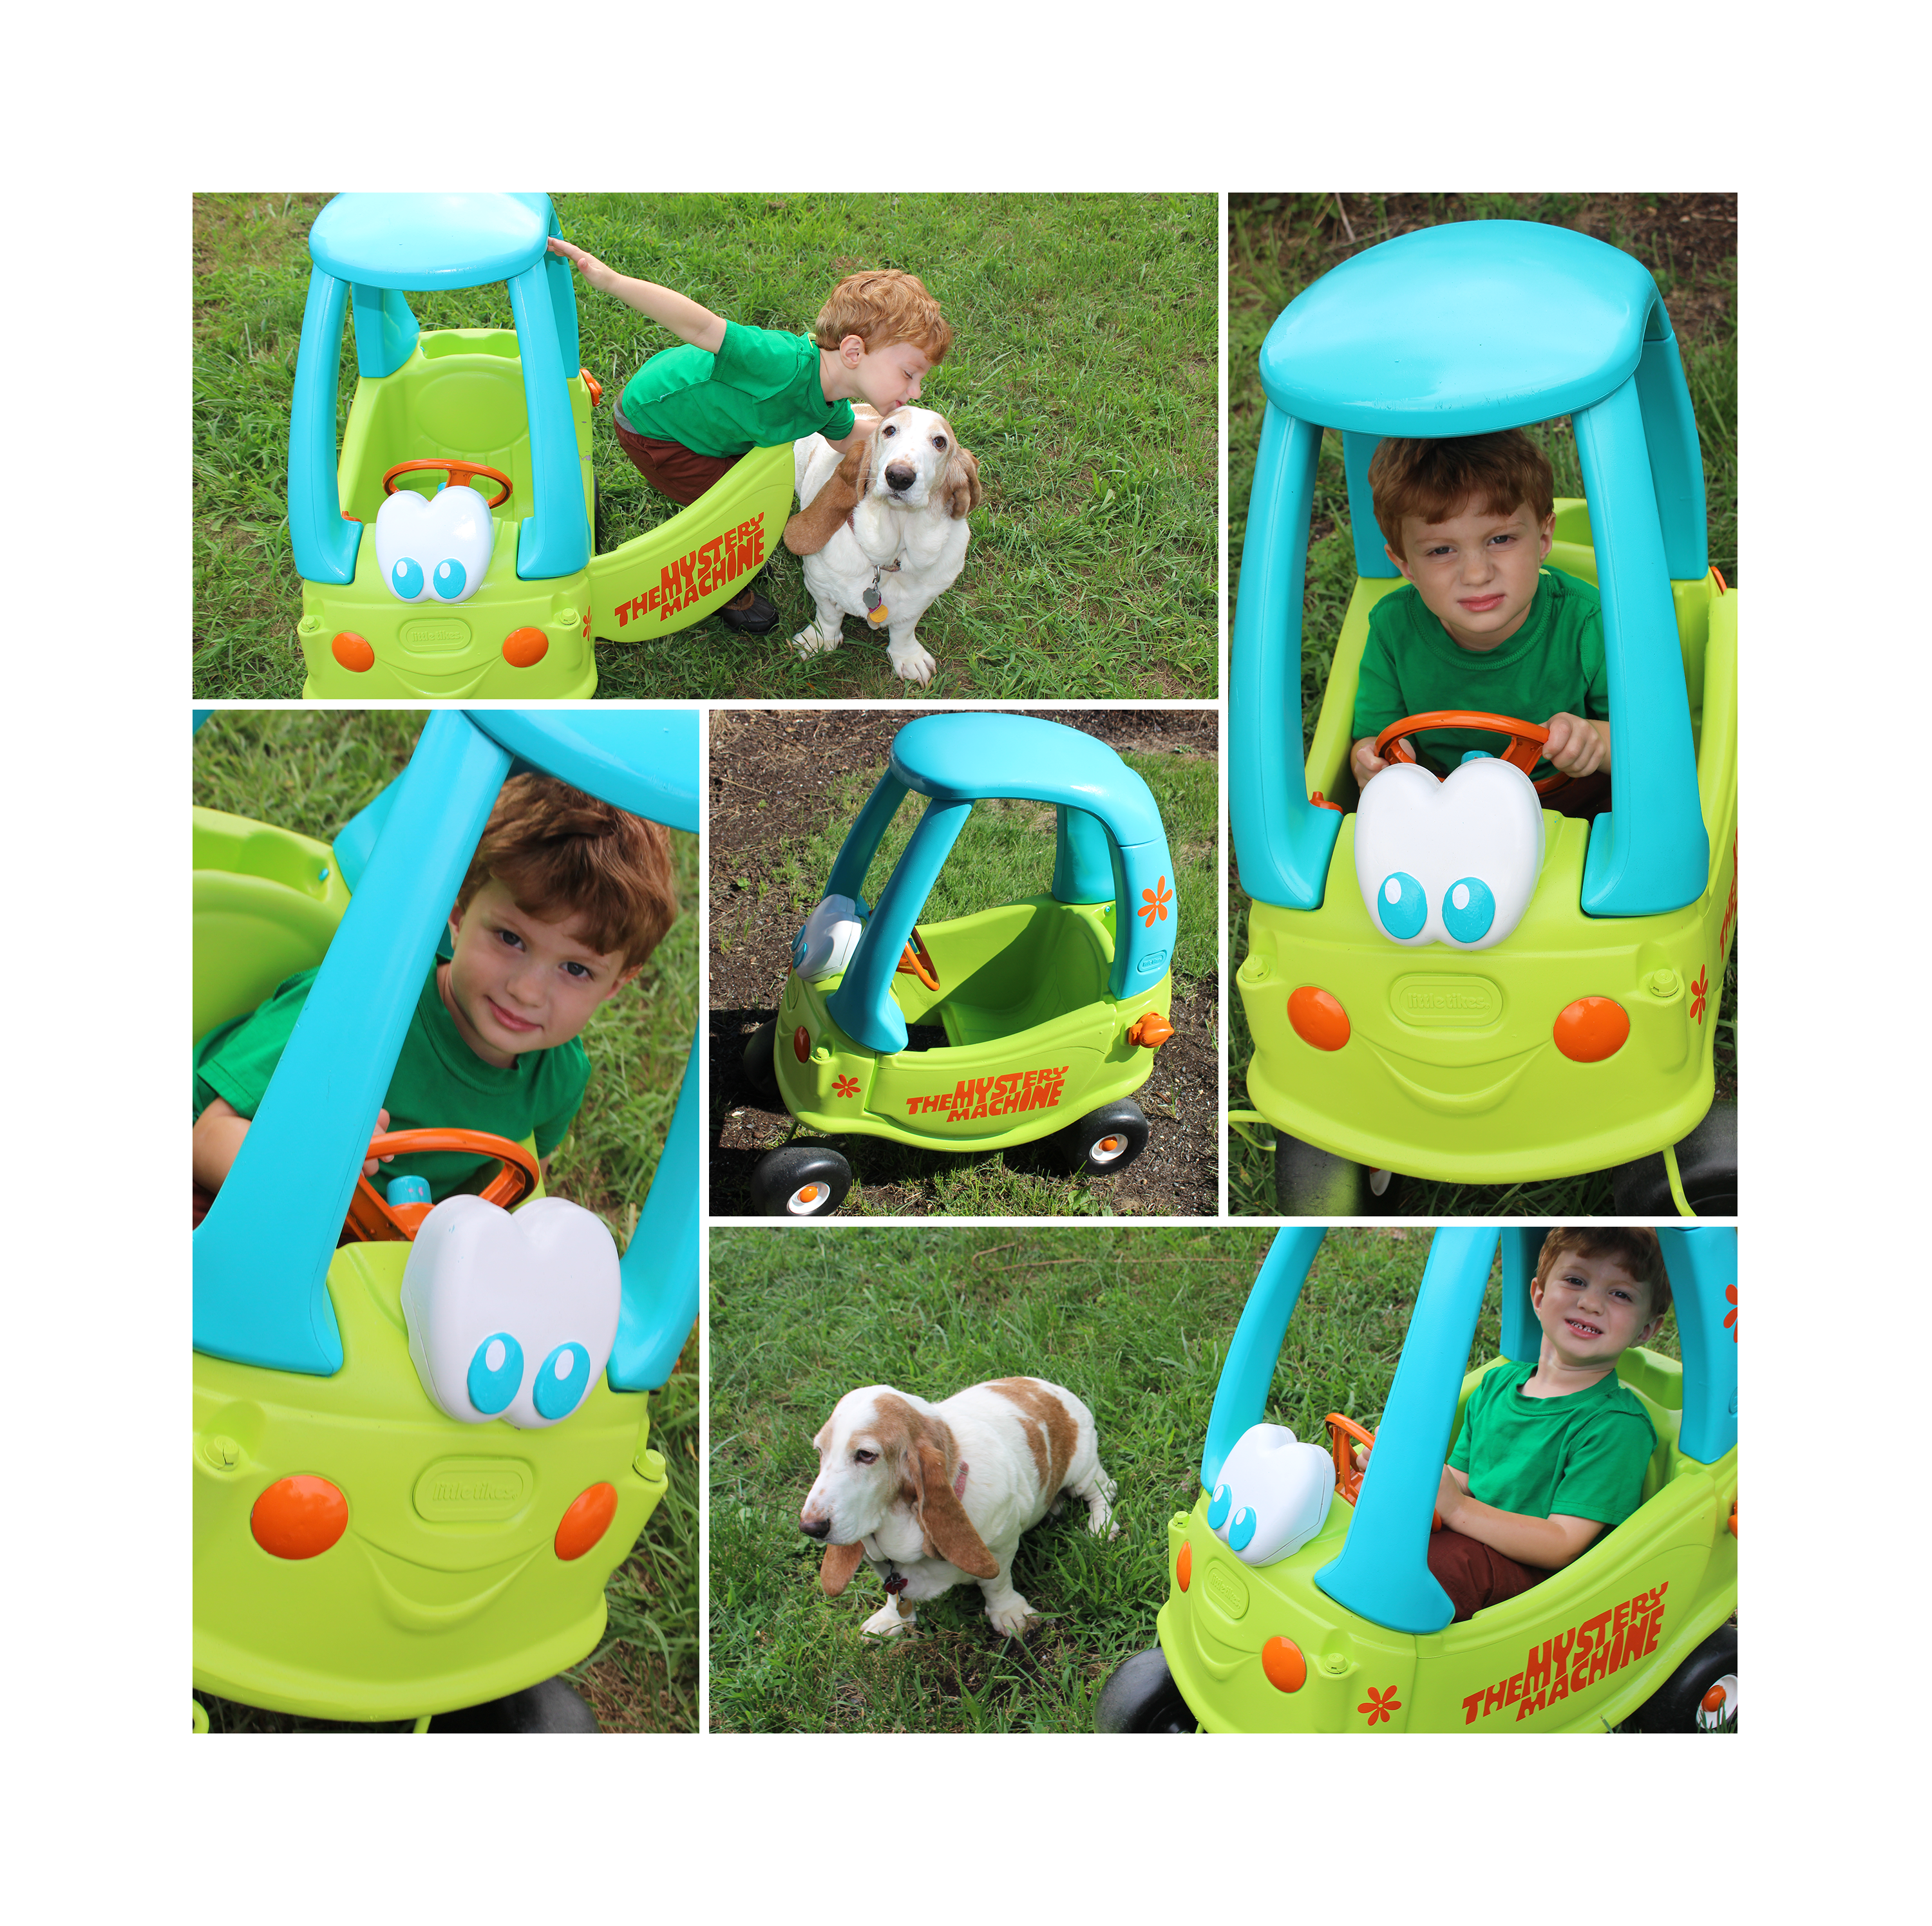
Mystery Machine Little Tykes Remake (An Eventful Summer)

It has been an insanely busy summer. We traveled a lot, and I spent a lot of time planning for a personal goal (I hope to have ready to launch in the next two weeks).  We went to New Orleans in early August, and a few weeks later we drove down to Florida and enjoyed the theme parks and Daytona.

New Orleans

Jack loved meeting his heroes, Mickey, Spongebob, and Shrek and Donkey. Daisy was less than thrilled about the characters, but had fun. We ended summer with Daisy’s first birthday. Oh I just can’t believe my baby girl is one!!

Florida

One thing I was able to do this summer in the craft realm was make this awesome Mystery Machine for Jack (and eventually Daisy). It was originally a pink and purple Little Tykes that my niece Myla long grew out of and donated to me.

Honestly, the hardest part about making this Mystery Machine was cleaning it because my hose was broken so I had to use a bucket of water. You have to take it apart to clean it well. All pieces come off easily except the tires. Instead of taking them off, I just tied bags around them.

Little Tykes Redo

After it is clean, just spray paint. For the tire wheels, eyes, and steering wheel, I sprays paint into a bowl and used a brush. Once all the pieces are dry, put it all back together. I made the Mystery Machine logo and flowers with my cricut and cut them from Oracle 651 vinyl.

Mystery Machine

Jack loved it so much he kissed it! So of course I dressed him up like Shaggy and had a mini photo shoot with it.

Jack Mystery Machine

Cute right? I hope your summer was wonderful!

Cape May and Fairy Gardens

I’m kind of sad that summer is unofficial lye over, but I can’t complain. I’ve spent the last few weekends of summer happily. A few weeks ago, Matt and I decided to go on a mini road trip down memory lane to our old Stockton stomping grounds. Normally our trips to our old college town would take us to the winery, but since only one of us can enjoy the wine, we ventured down to a Chinese take-out place we often went to through college. They have the best sweet and sour chicken ever. We continued south to Cape May where we explored the shops (where i found a lot less antiques than I expected, but some great craft ideas), walked the boardwalk, and enjoyed an indirect flashback to our alma mater again. Despite a few holes in one, I fell apart and panicked at the end of our game, and Matt beat me by 5 points.

a lovely time

Even though I lost, Matt still treated me to a beautiful had beaded bracelet in my favorite color. I can’t even tell you the shop he bought it from because there was no sign on the building.  We had dinner at an Irish pub where I, of course, ordered the butter lobster rolls, and stopped for smoothie desserts.

 Making the cake!

We also celebrated my niece Laila’s birthday. The night before the party, the kids all came over to watch the original Teenage Mutant Ninja Turtles movie (which they loved) and help bake Laila’s tie-dyed  cake and cookies. Everyone was in charge of mixing and poring a color.

Laila's Frozen Cake


They turned out great!I decorated the cake for a Frozen theme party with blue frosting and white snowflakes.

Happy Birthday Laila! Laila & Olivia, or Ana & Elsa

To add to the birthday festivities, we made a fairy garden in a hollowed out tree stump.

Fairy Veggie Garden Fairy table

We used a fairy garden kid along with a few mini items I found at Michael’s.

Adding to the fairy garden All the kids helped

I glued floral pins to the bottoms of everything to stake them into the ground.

Welcome Fairies!

The only thing left to do is plant some pretty fall flowers. with a hideaway like this, fairies are bound to make this their new home!

Fairy Garden!


Backyard Camping

It’s been a crazy August in our house. I’ve been wanting to start the baby room, but right now it’s still a storage space. We have to water proof the basement first so our things don’t get ruined. It’s been feeling a bit cluttered, but not cluttered enough to cancel our backyard camping with my nieces and nephew!

 InstagramCapture_78fc8b8d-5c21-42b8-a1bb-45b559247f34_jpgFire Pit Time!

Matt finished the rock wall around out fire pit,

IMG_8640

and it’s the perfect space for marshmallow roasting

Marshmallow Roasting

and making s’mores.

S'more!

Matt helped them pitch a tent, which was a fun play space.

Tent Time

Everyone decided to actually sleep in the living room instead of the tent because of some drizzling rain, but we made sure we’ll have another camping day when the weather is better!

InstagramCapture_faaf0b15-7763-44fe-964f-8a9b3a51eed4_jpg

The next weekend we finally made Angelina’s Titanic shadow box. She knows everything there is to know about the ship, and the shadow box includes commemorative coins, pictures of the actual ship, Rose’s hair clip and necklace, and even a piece of coal from the actual ship!

Titanic Box

The kids are all on vacation this week with my parents, but should be back this weekend. I miss them! I’ll need to post my beach wreath and fairy garden soon. Happy end of summer!

Gardening Wreath

I’ve been behind posting my wreaths, but here is my gardening wreath I made to hang before and after my flag wreath.

Gardeoning Wreath 2

So cute! The base of the wreath is a 10ft. leader hose in a wire wreath. You also need twine, gardening gloves, flowers of your choice, and a toy gardening kit.

Use twine to tie the hose in a circle.

Then tie the hose into the concave part of the wire wreath.  You can add a dab of hot glue for reinforcement. You can also cover the twine with the flowers and gardening tools.

tie to wire wreath


The flowers I chose pop right off their stems.

pop flowers off stems


Just hot glue them onto the hose.


The base of the flowers fit nicely in the hose crease.


flowers!

For the opposite side, I used the gloves and the toy kit. The handles are bulky and hard to attach, so I unscrewed the heads off the shovel and hoe.

detach heads from handles

I screwed just the heads together and used glue because I didn’t have a small enough washer.

use glue as a washer

Tie the toy tools to the hose.

tie down tool heads 

Glue the gloves down to cover that the handles were removed.

glue down gloves

The toy kit I bought had flower markers, so I used white nail polish to write in some flowers before I glue them in.

sprinkle in flower tabs

Finished! And adorable! Happy gardening!

Gardening Wreath


Toadstool Planter and Lilu’s Big Announcement

Toadstools are adorable. Last summer I made these ceramic toadstool houses and a toadstool bird feeder. 

WP_20130831_17_02_46_Pro

To bring the toadstools outside, I made toadstool flower pots. They are really easy and cheap to make. I used inexpensive plastic planters and painted them red.

WP_20131116_012

Then I used white caulk to make the spots on the planter.

WP_20131116_017 WP_20131116_016

The caulk dried overnight and the planter was ready to go. I planted red Gerbera Daisies surrounded by little white flowers.

WP_20140626_003

Easy and sweet looking!

WP_20140626_008

In other news, Lilu made a big announcement this week. She’s going to be a guard dog/big sister!

IMG_8601

We’re expecting the little one on December 5th. We’ll find out if it’s a he or a she then. In the meantime, Lilu’s very excited about the position

10447085_10152504732895782_2226528867143150501_n

Pot Tower

So you’ve probably seen these adorable pot stacks on Pinterest. I made them last year for the front of the house. This year, I put them on the side, against our fence.Image


I think like them better there because the honeysuckles on the fence make them look even more whimsical. I didn’t use a tutorial, just figured it out by eye.

The towers are made with a 4ft concrete rod and 6 terracotta pots.

Image

1 – 11″ pot

1 – 10″ pot

2 – 8.5″ pots

2 – 6″ pots

I spray painted mine last year in fun colors (they’re also the color scheme I used for my pot wreath).

Image

You also need something to help stabilize the pots so they look like they are going to tip over. Use whatever you have, like rocks, broken brick or you could even use those small water bottles filled with sand. I have lots, and lots of river rocks that were all around my yard, so I used them.

Start by staking in the concrete rods.

Image

Thread the pot 11″ through the drain hole.

Image

Use rocks and dirt to fill the bottom of the pot (The rocks will help stabilize the top pot and help you use less dirt)

Image

Image

Thread the 10″ pot through the drain hole and tilt the pot. Adjust the rocks from the bottom pot for the top pot to rest on.

Image


Use a rock inside the top pot to weigh it down on one side.

Image

Continue with the rest of the pots, alternating which side you tilt the pot. You may have to shift the rocks and dirt to support the different pots.

Image

At the top, you can hammer in the concrete rod deeper into the ground when your closer to the top.

Image

 Image

Now plant away! Because I disassemble these for the winter, I only use annuals in the pots. Now I guess you could plant as you go so you don’t have to remove the dirt you just put in, but I like to be safe and not risk crushing the plants.

Image

I like to plant a different flower on each tier, and I try to mix in some whimsical looking flowers (like those tall red ones and the fuzzy cone shaped ones). I planted the extra flowers between the two towers and in tiny, 4.5″ pots.

ImageImage

I love my pot towers. I love the colors, the flowers, the way they look against the honey suckle fence. I just plain love them. They didn’t take too long to assemble, but I started late in the day. By the time I was finished it was dusk. A lightning bug cruised on past my tower. I think she liked my flower pots. In my book, the lightning bug means it’s officially summer. Happy Summer everyone!

Pot Wreath

Ok,  it’s been over a month since I made it, but I thought I should put my May wreath up. If you haven’t seen the wreath on Pinterest yet, prepare yourself for something pretty.  

Image

My friends Caroline and Sarah came over for a Pinterest party, and we decided to make these wreaths.  We found them on Pinterst, and used the tutorial here:

http://www.bloglovin.com/viewer?blog=1809101&post=2628708147

The tutorial has all the materials listed and is very easy to follow.

I decided to paint my pots to match the pot towers I put outside (another Pinterest inspired project I’ll be posting). Sarah and Caroline didn’t paint their pots.  I think their wreaths look very sophisticated, while mine looks a bit more on the whimsical side.  

ImageImage

If you want to paint your pots, do that first. Tie down the larger pots first. 

Image

Image

Then fill in the spaces with the smaller pots. Switch up the direction of the pots, they shouldn’t all face the inside of the wreath.

Image

Image

We cut cubes of floral foam and filled the pots with it after they were all tied down.

ImageImage


Then just hot glue the faux flowers. I used a lot of succulents mixed in with purple flowers and some faux moss. I added the moss last as a filler.

Image

They’re not very difficult, but they are pretty heavy. Make sure your wreath holder is a sturdy one. Also, this may be too big if you have a screen door. Mine barely closes with the screen door. I think I may move this to my side door to be closer to my topsy turvey pots.

Asterisk Gifts

(609) 549 22 38